Tuesday, May 13, 2014

Green Tea Ice Cream


Made a Green Tea Ice Cream for this weekdays dessert. It's simple and no need to use eggs. I also bought canned Longan, Red/Green Bean paste Mochi from Mocha Mochi (they make a very good Mochi in this town) to complement with ice cream.

First time I bought Mocha Mochi because they have a really beautiful packaging for their products, but then their Mochi  also taste very delicious and so soft.


Isn't the packaging beautiful?


 Plain Mochi


Here's the recipe:

Ingredients
  • 2 cups Half and Half (or 1 cup whole milk + 1 cup heavy whipping cream)
  • 3 Tbsp green tea powder (matcha)
  • ½ cup sugar
  • Pinch of salt (about 1/16 tsp.)
Instructions
  1. Freeze the ice cream bowl for 24 hours.
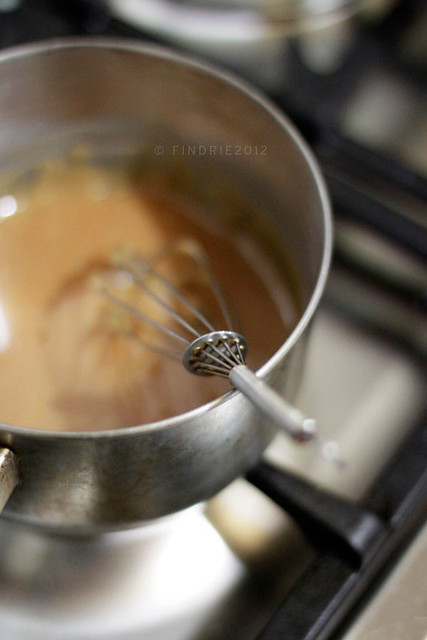
  2. In a medium saucepan, whisk together the half and half, sugar and salt.
  3. Start cooking the mixture over medium heat, and add green tea powder. Stir often and cook until the mixture starts to foam and is very hot to the touch but not boiling.
  4. Remove from the heat and transfer the mixture to a bowl sitting in an ice bath. When the mixture is cool, cover with plastic wrap and chill in the refrigerator for 2-3 hours.
  5. Once the mixture is thoroughly chilled, transfer to a pre-chilled ice cream maker and churn according to the manufacture's instructions (20-25 minutes). Transfer the soft ice cream into an airtight container and freeze for at least 3 hours before serving.
You can see the step by step for making this green tea ice cream from this blog.  Enjoy :D


Sunday, March 16, 2014

Red Velvet Cake


My husband had his birthday on last 14 March (it's also the same birthday with my Dad :D). He's not really a big fan of cake if it's not a really good Chocolate or Cheese Cake. One time I bought a Red Velvet Cake from UNION (which I think the best one in town) and he tried it for the first time.. and he likes it.. no, He loves it actually.. couldn't get enough of it. So I made a promise to myself that I'll try to re-create the cake for his birthday.


 The Red

Turns out I didn't have time to do it on his birthday (I bought the usual Chocolate Cake for him) until this weekend I had a chance to make the RVC. Years back when I made my first RVC, the texture was really dense, and I don't really like it. So I browse for another recipe and found this one looks promising, it says that the cake will turns out really moist (as the UNION RVC also have a moist texture). The topping was a combination of Nuts and Crumble. I'm trying to make it on my own recipe, but it seems need more adding this and that to a perfection (which I will think about it again on my next attempt).

So here's the Recipe, taken from this blog (Thank you for sharing the recipe because the cake IS MOIST as promised!)


RED VELVET CAKE
Ingredients
  • 2 cups all purpose flour
  • 1 teaspoon of baking soda
  • 1 teaspoon of baking powder
  • 1 teaspoon of salt
  • 2 Tablespoons unsweetened, cocoa powder
  • 2 cups sugar
  • 1 cup vegetable oil
  • 2 eggs
  • 1 cup buttermilk
  • 2 teaspoon of vanilla extract
  • 1-2 oz. red food coloring
  • 1 teaspoon of white distilled vinegar
  • ½ cup of prepared plain hot coffee (don’t skip this ingredient)
Instructions
  1. Preheat oven to 325.
  2. In a medium bowl, whisk together flour, baking soda, baking powder, cocoa powder and salt. Set aside.
  3. In a large bowl, combine the sugar and vegetable oil.
  4. Mix in the eggs, buttermilk, vanilla and red food coloring until combined.
  5. Stir in the coffee and white vinegar.
  6. Combine the wet ingredients with the dry ingredients a little at time, mixing after each addition, just until combined.
  7. Generously grease and flour two round, 9 inch cake pans with shortening and flour.
  8. Pour the batter evenly into each pan.
  9. Bake in the middle rack for 30-40 minutes, or until a toothpick comes out clean. Do not over bake as cake will continue to cook as it cools.
  10. Let cool on a cooling rack until the pans are warm to the touch.
  11. Slide a knife or offset spatula around the inside of the pans to loosen the cake from the pan.
  12. Remove the cakes from the pan and let them cool.
  13. Frost the cake with cream cheese frosting when the cakes have cooled completely.


Notes

~TIPS~
Be sure to not overbake! Check the cake at 30 minutes as some ovens run really hot.
Cakes are really moist and you may need to refrigerate them to firm them up before stacking and frosting.
To bake cupcakes, bake for 18-20 minutes, checking at the 18 minute mark.
I'm pretty satisfied with the cake texture, yet I still have to work on that topping to get the right balance taste between the nuts and crumbs. Also the Red coloring need to be more vibrant. Despite on those things, I'm quite happy with overall taste (not too sweet), should have been making it into 4 layers though, so you could really taste the cream cheese frosting. Meanwhile, hubby like it so far.. that what matters most haha *happy* :D
 

Wednesday, March 12, 2014

Banana Cranberries and Pistachio Nut Bread with Lemon Cream Cheese Glaze


This week dessert theme will be a loaf/bread week. I still have dried cranberries on my fridge and would like to do something with it, so I browse some of recipes using cranberries. I used to had this cranberries bread at Starbucks which I really love, so I might gonna make similar thing like that.

Call me lazy, but a simple recipe always the one that attract me first he he. After those browsing I saw this one from Foodgawker that looks really nice: Cranberry Banana Nut Bread (here's the real recipe from). I made a modification with adding a glaze on top of the bread (simply because I saw other recipe that has the glaze then I combine it).


INGREDIENTS
For the Banana Cranberries Bread:
  • 1/4 cup butter, melted
  • 1 cup white sugar
  • 2 eggs
  • 2-3 mashed over-ripe bananas > If your banana aren't ripe enough simply cut them in half and just cook them on a non stick pan for awhile (no need oil or anything) until it's softer and easy to mashed them.
  • 1 cup coarsely chopped fresh or frozen cranberries > I'm using dried packed cranberries
  • 1 1/2 cups all purpose flour
  • 1 1/2 tsp. baking powder
  • 1/2 tsp. baking soda
  • 1/2 tsp. salt
  • 1/2 tsp. cinnamon
  • 1/2 cup coarsely chopped Pistachio Nuts (or whatever nuts you desire)
  • 1 tsp. Lemon zest

 Dried Cranberries

 For the Lemon Cream Cheese Glaze:
  • 1 cup (120g) confectioners' sugar
  • 2-3 Tbs Cream Cheese (room temperature)
  • 1-2 Tablespoons lemon juice or from 1 squeezed Lemon
METHODE
For the Banana Cranberries Bread:
  1. Preheat the oven to 350F and grease a 21.6 x 11.4 x 6.35 cm loaf tin (I'm using Wilton tin)
  2. In a medium bowl, mix together the butter, sugar, eggs, and banana. Then add lemon zest.
  3. Blend the dry ingredients together and stir them in just to moisten (do not over mix).  Gently mix in the cranberries and pistachio.
  4. Bake for an hour until a toothpick comes out clean when poked into the middle.  Let it cool for about 10 minutes before removing from the pan and cooling on a rack.


Fresh Bread from the oven

For the Glaze:
In a small bowl, whisk the confectioners' sugar and lemon juice together. Add Cream cheese one at a time and more lemon juice depending how thick you want the glaze. When finished, drizzle over cooled bread.

Lemon Cream Cheese Glaze

 
NOTE: Unglazed bread stays fresh covered tightly at room temperature for 5 days or in the refrigerator for 6-7 days. Glazed bread must be stored in the refrigerator for up to 3 days. 


The results, this is by far the best combination taste of loaf/bread that I've ever made. The texture is full of fiber, it smells heavenly because of the banana, cinnamon and freshness from Lemon zest. And the combination between sweetness and sour because of the Lemon Cream Cheese Glaze... It's so hard not to eat only one slice. Wanna bet? :D

Wednesday, March 5, 2014

Strawberry Cheesecake Ice Cream


I got these fresh strawberries from my niece who went to a field trip to Bandung last month. She went to this Strawberry farm and hand picked one package fresh strawberries for her aunty. How sweet of her :).

Anyway, I frozen half of the berries just in case I'm gonna do something with it later on. I was thinking about making another Frozen Strawberry Cheesecake in a Jar, but then I saw a recipe on one of my fave blog about this Strawberry Cheesecake Ice Cream.

Thinking that been a long time not using the little Ice cream machine, so why not using it again this time. I still have stock of Cream Cheese and Whipping Cream in the fridge, better use it before it's expired :D


So here's the recipe, taken from Just One Cook Book
I love this blog because mostly it has a step by step photo.
(my other wish list is to have a tripod for my camera, so I could take a step by step photo too)


Strawberry Cheesecake Ice Cream
Ingredients:
  • 1 1/4 cup Half & Half (a mixture of one part milk to one part cream)
  • 3/4 cup heavy whipping cream
  • 4 oz. cream cheese > turns out I'm using 230gr of Cream Cheese hihiii
  • 3 egg yolks
  • 3/4 cup sugar > I'm using icing sugar
  • About 6 large strawberries (you will need 3/4 cup strawberry puree)
  • About 3-4 large strawberries (you will need 1/2 cup chopped strawberries)
  • 4 honey graham crackers, crushed into small bits. > I'm using Ritz Cheese Crackers
  • 1 1/2 tsp. vanilla extract > I didn't use this

Instructions:
  1. In a small saucepan bring the half-and-half and heavy whipping cream to a scalding point on medium low heat. “Scalding” means gently heating without allowing to reach boiling point. Immediately remove from heat. 
  2. In a bowl (or stand mixer), whisk cream cheese, egg yolks and sugar till they turn light in color and fluffy.  
  3. Once the egg yolks mixture is done, gradually pour and mix the scalding half-and-half & heavy whipping cream mixture in batches. Keep whisking constantly to avoid the eggs from curdling. 
  4. Now place the bowl over a saucepan of simmering water, keep stirring continuously with a spoon until it starts to thicken up. Once the consistency is thick enough to coat the back of the spoon, the custard is ready. Immediately remove the bowl from the heat and stir it for few minutes to help it to cool down a bit.  
  5. Meanwhile, make strawberry puree and chop up strawberries and crush the honey graham crackers.> Don't worry if you don't have a food processor. I chopped the strawberries with knife and smashed them :P And for the crackers put them inside a plastic sealed bag then crush it with spoon (or something that's heavy). It works :D
  6. Now add the vanilla essence and strawberry puree and stir well one last time. > Didn't use vanilla essence straight by pouring the puree and stir.
  7. Cover the custard and let it chill in the refrigerator for few hours before making the ice cream. 
  8. Once you're ready to make the ice cream, transfer the chilled custard to the chilled container of your ice cream machine and process according to the manufacture's instruction. 
  9. During the last 5 minutes of ice cream churning in the machine, add the chopped strawberries and graham crackers.  
  10. Transfer the ice cream to a container and let it sit in the freezer to set, about 3-4 hours. Serve Chilled.


Pour the strawberry coulis and extra crackers on top of the ice cream before you eat it.
Heaven!


Sunday, February 2, 2014

Frozen Strawberry Cheese Cake

It's been a productive week at work, so many deadlines and it's horrible! Beside making the Strawberry crumble before, I need another dessert that could indulge me (and my family) for this long weekend. Something sweet and sour and also fresh. So I decided to make a Frozen Strawberry Cheese Cake.


Been a long time since my first trial making  frozen strawberry & blueberry cheese cake couple years ago, it's basically same ingredients. I'm using this recipe from Nigela website with a bit of adjustment.

Strawberry Cream Cheese - Ingredients

  • 125 grams digestive biscuits- I'm using Ritz Cheese Crackers
  • 75 grams butter (soft)
  • 300 grams cream cheese- I use 250 gr Cream cheese & 50 gr Sour cream
  • 60 grams sugar- I use only 50 grams
  • 1 teaspoon vanilla extract- I omit this one because I don't have this at the moment
  • 250 ml double cream
  • strawberry jam (2 pots)
  • strawberries (fresh, a few to decorate or strawberry sauce to drizzle - optional) - I made a raspberry coulis instead.
  • Grated Lemon Zest
 

Strawberry Crumble


Another easy and simple dessert to make. After couple times made an Apple crumble, this time I wanna try using different fruits: Strawberry!

Ingredients

for the filling:
  • 500 grams strawberries (hulled)
  • 50 grams caster sugar + brown sugar
 for the topping:
  • 100 grams plain flour
  • 1/4 tsp salt
  • 75 grams cold butter (diced)
  • 100 grams muesli
  • 75 grams sugar+ brow sugar
  • double cream/ice cream (to serve)
 

#SundayCooking: Burgers

One of our favorite menu for Lunch/Dinner is Burger!. A homemade patty is really simple to make and it tastes even more delicious than the one that ready to buy.
You could also decide how thick the beef patty is, depends on how you like it.

There are lots of recipe from books/internet to make beef patty, I usually use this recipe:

3 small Red Onion
2 small Garlic
1/2 of small Onion
All slices and cook them with Olive Oil until half cooked

300 gr Minced Beef - less fat is more juicy
Herbs and spices (Rosemary/Italian Herbs Mix, Black Pepper, Garlic Powder)
Worchestersheir Sauce & BBQ Sauce
Breadcrumbs (instead of using breadcrumbs, I use a Wholegrain bread, toast and then crush them into pieces) 
Salt
Olive Oil
4 Burger Buns

How to:
Combine half cooked union/garlic to the beef, add herbs, add 1 Tbs Sauce Worchestersheir & BBQ Sauce, crushed wholegrain bread to the beef and then mixed them all with your hand.
Divide the mixture into 4 equal portions shape each portion with your hands into a patty.

Place the patties onto a tray lined with- greaseproof paper. Cover with plastic wrap and place in the fridge for at least 30 minutes to rest. Chilling the patties will help them hold together when cooked. This also allows the flavours in the patties to blend and develop. If you chill the patties for any longer, increase the cooking time slightly.

Heat half the olive oil in a large, non-stick frying pan over medium-low heat and cook half the patties for about 4 minutes on each side or until browned and cooked through. It is important to cook mince right through because it has a larger ratio of surface area to volume than whole pieces of meat, and is therefore at greater risk of contamination by bacteria in the air. Transfer the patties to a plate, set aside and keep warm. Repeat with the remaining oil and patties.

For the buns, preheat grill on high. Place the hamburger buns, cut-side up, under the preheated grill and toast for 1 minute or until golden. 
To Serve, Spread mayonnaise on the buns add beef patty and sauted garlic & mushroom on top of it. You could also add shredded lettuce and tomato first or Cheese before.
Served with side dish, mixed veggies and french fries.

Enjoy your Burger with a homemade beef patty!


NYE Family Dinner - Steak Party

It's time to be Thankful for what we had in 2013 and to cherish the a new excitement on 2014.

We didn't go anywhere to Celebrate New Year's Eve, so I made a Family Dinner for 4 of us. Oh yes, we're expecting another baby this 2014 that's why we're very blessed and so excited.

We planned to have Steaks night complete with salad (minus dessert).

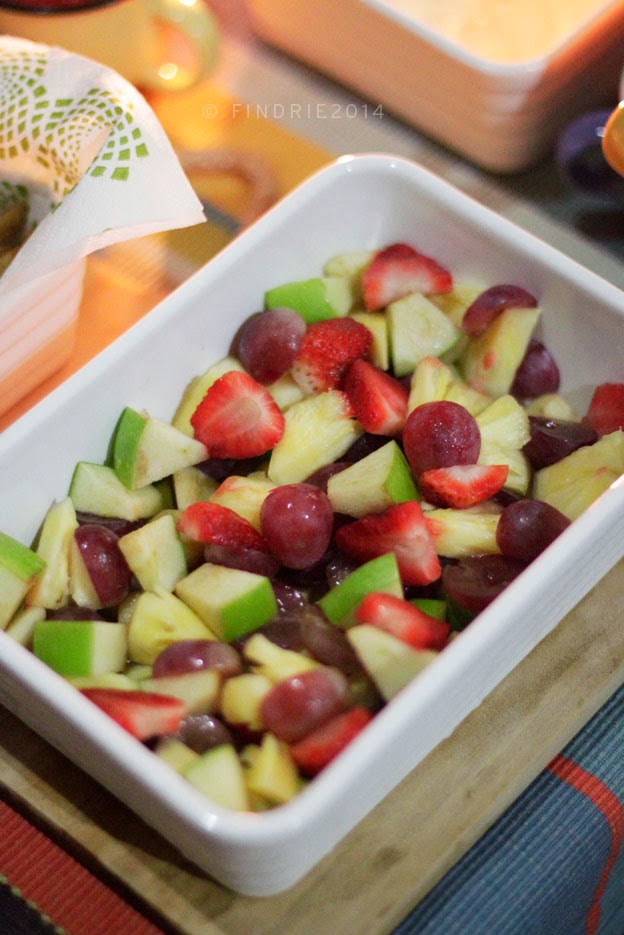
Start with Fruit Salad: Mixed of Grapes, Apples, Pineapples and Strawberries. Mixed with dressing: mayonnaise, lemon zest, a bit of milk (sweetened) and grated cheese.


Mixed Veggies from Asparagus, Baby Carrots, Baby Potatoes. Baked them with drizzled of Olive oil, rosemary, black pepper and sea salts.
Main Course: Rib Eye Steak and Sirloin Steak. Somehow I pan fried them a bit too long so it's too well done. Oh well, since I only cannot eat rare/medium steak so it's fine. I only marinated them with garlic powder, black pepper, italian herbs, sea salts and butter for only half an hour. And then cook in a pan with a bit of Olive oil.


Also made French Fries for the big boy.
I made a wasabi mashed potato. It's just a usual mashed potato with added wasabi on it. Not too much though.. only to get the taste of it. Surprisingly Wasabi goes really well with mashed potato.

Since I didn't make a dessert, so I made a refreshing drink to complete the after taste, a fresh Lemonade with Soda.

Totally full and happy tummy! And now we're waiting for the count down.

3..2..1.. Happy New Year!

Goodbye 2013, You've been awesome to us and Hello 2014
We're excited to see you :D


Easy Breakfast: Bread, Eggs and Asparagus

I love making an easy breakfast for me (and my family) and I try to do different menus everyday. Somehow it challenged me to be more creative each day.

No need a fancy ingredients.. sometimes you only need a bread or eggs that's already enough. I will try to post many variations of what breakfast that I usually make.


Let's have breakfast!

Monday, November 25, 2013

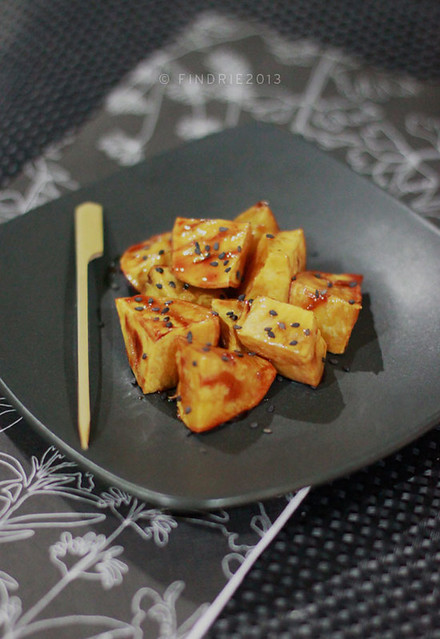
Candied Sweet Potato (DAIGAKU IMO, 大学芋)

DAIGAKU IMO, 大学芋
A yummy japanese dessert and it's really easy to make.

I'm using recipe from JustOneCookBook. Here are the ingredients:
  • 11 oz. (300g) Japanese sweet potato
  • 3 Tbsp. vegetable oil
  • 5 Tbsp. sugar
  • 1/4 tsp. soy sauce
  • 1/4 tsp. rice vinegar
  • 1 tsp. roasted black sesame seeds 
How to:
  1. Wash the sweet potato carefully, as we don't peel the skin off.
  2. Cut diagonally while rotating the sweet potato a quarter between cuts. This Japanese cutting technique is called “Rangiri”. 
  3. Soak in water for 15 minutes to remove starch. Change the water a few times. 
  4. Wrap the frying pan’s lid with kitchen cloth. This is to prevent condensation on the lid dripping into sweet potatoes while cooking. 
  5. Do not heat the frying pan yet. Add sugar, oil, soy sauce and rice vinegar in the pan and combine all together. 
  6. Dry the sweet potatoes completely with paper towel and place in the pan. 
  7. Cover with the lid and turn on the heat to medium.
  8. When you hear bubbling sound from the pan, turn the heat to low to medium-low, and set timer for 2 minutes. Open the lid and flip the sweet potatoes every 2-3 minute so that all sides will have nice golden brown color and get flavored. 
  9. Depends on the size of sweet potatoes, the cooking time varies, cook for 8-10 minutes or until an inserted skewer goes through smoothly (I personally prefer it a bit tougher than completely soft texture). Now transfer to the serving plate/bowl and sprinkle black sesame seeds. 
* Vinegar helps the sugar from hardening when it cools down.

For complete step by step photo and video, visit here.


Sunday, November 24, 2013

#SundayCooking: East Meet West

Made 2 different dishes for this Sunday Lunch.

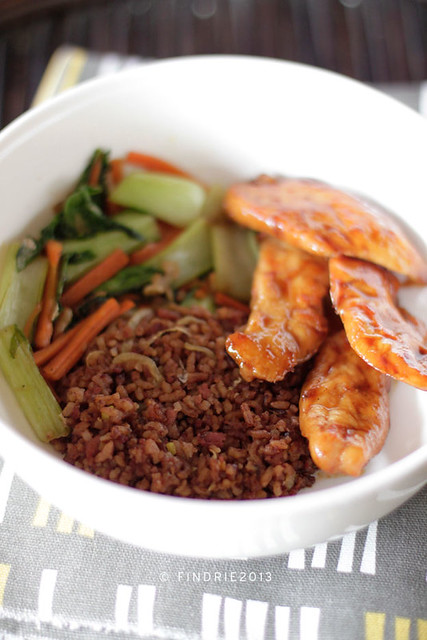
For son, Chicken Teriyaki with Red Rice and Stir Fry Veggies.
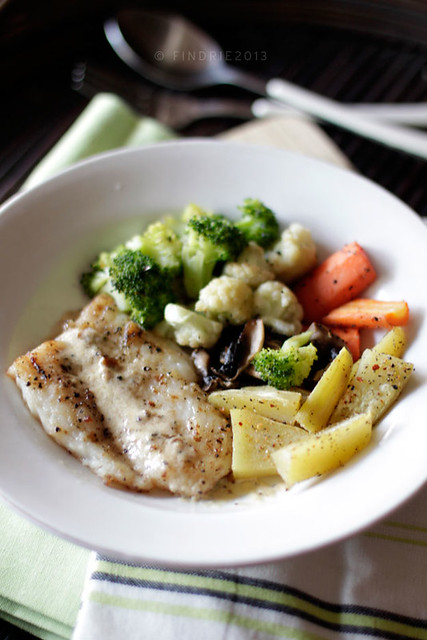
For us, Pan Fried Dory with Butter and Black Pepper cream sauce. Served with Grilled Yams, Mushroom and Veggies.

Chicken Teriyaki with Veggies
Chicken Teriyaki with Stir Fry Veggies

Pan Fried Dory Fish
Pan Fried Dory with Butter & Black Pepper cream sauce


Bon Appetit!

Saturday, November 23, 2013

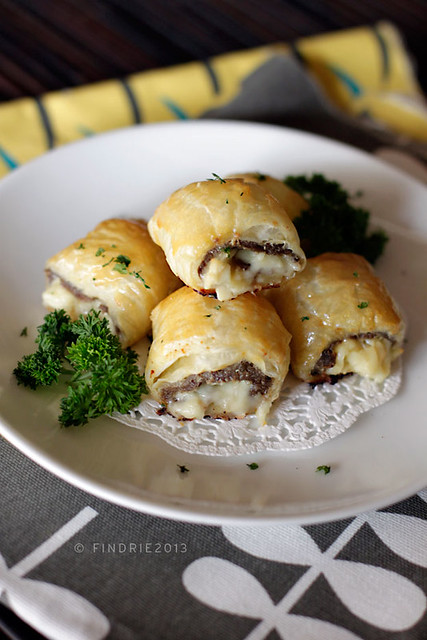
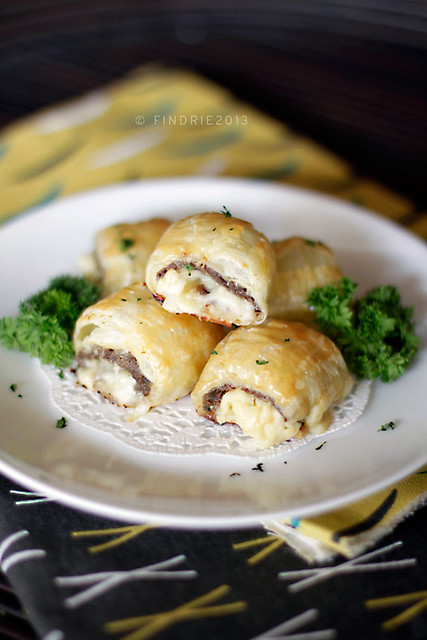
Sosis Brood with Cheese

Sosis Brood with Cheese

Sosis Brood or Beef sausage in a pastry. 
When you bought a ready to use pastry, it came in a lot quantity.
I have been using it for making a Zuppa Soup lately, but still there're plenty of them.

I remember I had this really nice Sosis Brood from Bawean (one of the most popular bakery in Bandung). My working partner brought me one, and I have never taste it before. At first I didn't know what the name was, when I heard it's called Sosis Brood, I instantly google it.
Basically it's a pastry with beef sausage inside with a cheese (optional) or whatever you like (some of it has veggies).

Sosis Brood with Cheese

Since I still have this plenty of ready pastry, so I'm gonna make one for an Afternoon snack.
I'm using recipe from here.

I made it in mini bite size, family love it!

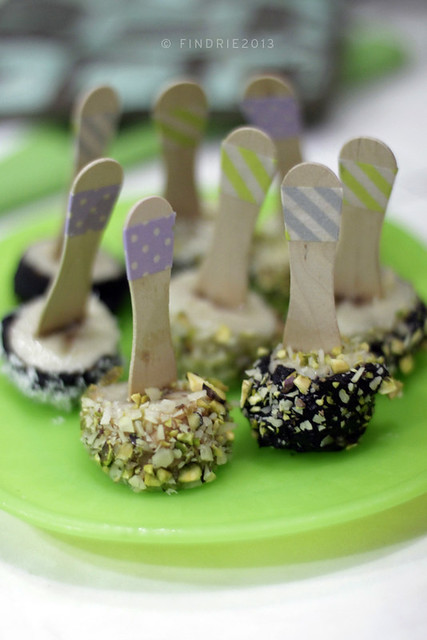
Frozen Banana

FrozenBanana2

A quick and simple healthy snack. Using only banana, chocolate (melted), peanut butter, almond, dried coconut and pistachio.

How to:
Cut Banana into desired sizes.
Coat some of it with Peanut Butter or Chocolate Melt.
Coat with Almond or Pistachio or Dried Coconut.
Put them into the freezer until it's chill.

Enjoy!


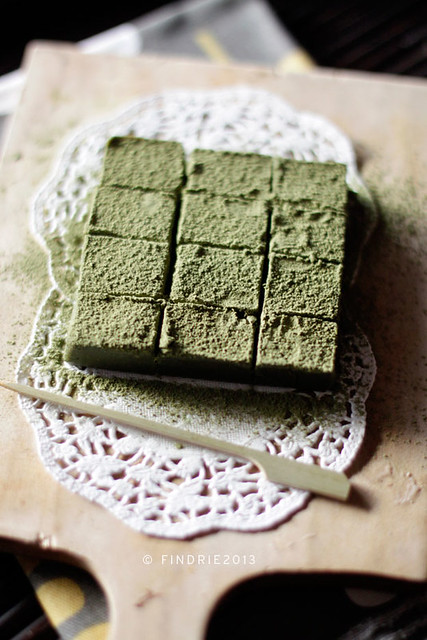
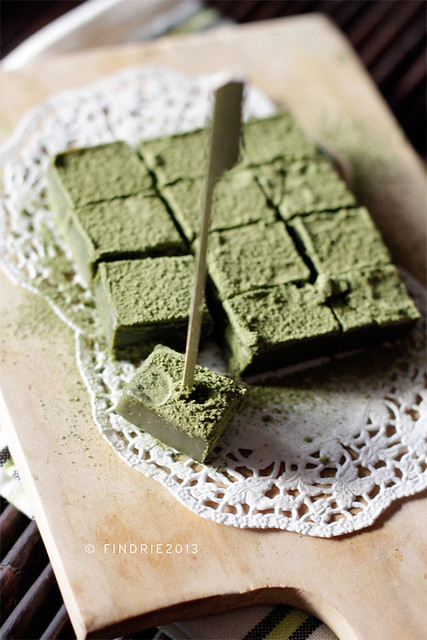
NAMA Green Tea Chocolate

 Nama Green Tea

Another attempt re-creating Nama Chocolate, this time with Green Tea Flavor.

I still haven't got the melting texture that I want, but hubby said it's close enough with the real one. One thing I like that you could really taste the bitter from Green Tea flavor mixed with the sweetness from chocolate. I still want to do another batch with slightly changing some ingredients to get the taste and texture that I really want.

Well maybe next week. Now I'm really overdosed by Chocolate! XP

Nama Green Tea

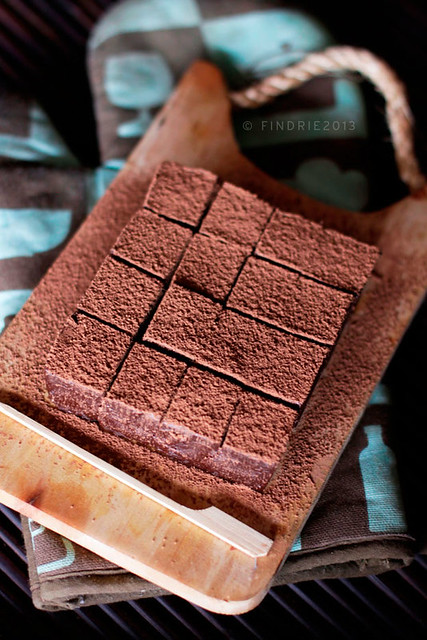
NAMA Chocolate

Hello there my neglected blog.
Sorry for being very busy (or lazy?) so I forgot to update you in such a long time :P
Okay from now on let's be in touch again as often as we can :D

I've been craving for one of Popular Japanese Chocolate: Royce Chocolate - NAMA Chocolate. Last time we had it when we're in Singapore (that was last year), and since then I never had one. I noticed they already open here in Jakarta, in 2 popular malls. But I haven't got a chance to buy them and since it's already in Rupiah price, somehow I feel like it's bloody expensive :P

I remember when I met my Singaporean friends, she said (when she knew that I bought that chocolate) "You know that actually it's not that hard to make one". I believe what she said at that time, because she's a really good home baker who could make Macarons in her 1st attempt! She said, basically it's the same texture like Chocolate Ganache. While I'm eating that chocolate I was like "Hey she's right!".

So I'm curious to try make one. I browse through internet and yes, you can almost find anything nowadays. I bumped into this blog Just One Cook Book and fell in love with her blog instantly. Not only because the food photography are amazingly beautiful, but she also put step by step with the photo of ingredients on the recipes. Who wouldn't love all those details!!! **Subscribe her blog straight away**

Anyway, she had this recipe for NAMA Chocolate, and yes, it's basically a chocolate ganache, dusted with Cocoa Powder for the finishing touch. Many of recipes there in different blogs, but I'm gonna try make one from her blog.
So here it is, a homemade NAMA Chocolate. It's easy to make, and addicting. One bite, two bites, never enough. I already forgot the real texture from Royce one, but for me this one is already close enough. I'm Happy :D

Nama Chocolate

Nama Chocolate

Click here for the recipe. Enjoy :D


Friday, January 20, 2012

Mojito Macarons

This is one of my experiment of making Macarons. I really love virgin mojito. It's really refreshing with it's lime soda, a bit of mojito and fresh mint. I wonder what would it be if I could make it as a macarons? I've browse the recipe and found one that I think I could give it a try.

I was thinking to get a sweet and sour from the lime as a taste. The shell would be the sweet part and the filling would be the sour.

Although it wasn't quite as I've expected, but the results was quite OK. The shell has a fresh fragrant from grated lime and the filling tasted creamy and sour :D


 I would try to perfecting the recipe once I get back to my kitchen.


Innards: Cream cheese with lime zest and mint.

Sunday, January 15, 2012

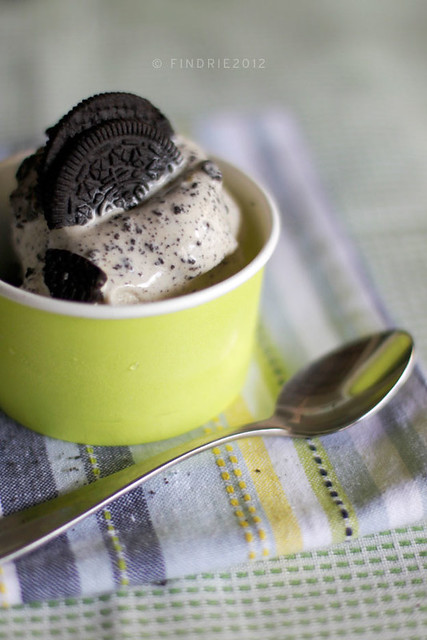
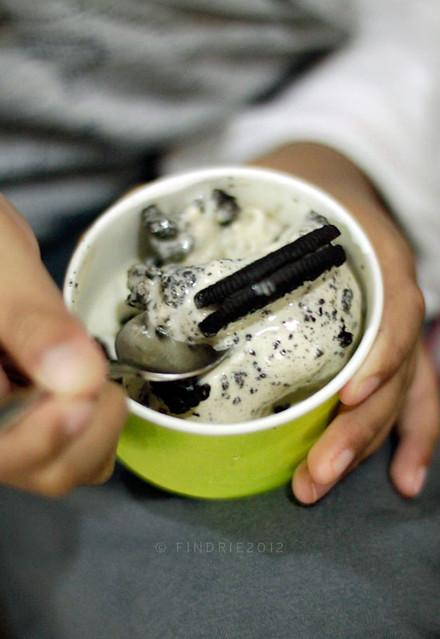
Cookies and Cream Ice Cream

Cookies and Cream Ice Cream
Homemade Cookies and Cream Ice Cream requested by my son

My son already bragging me for making his favorite ice cream since last month. He's kinda a boy who never ask for anything if he didn't really want it. So if he already ask about something couple times (or more), that means he demands for it :P. His favorite ice cream was Cookies and Cream from Baskin & Robins.. Last time I bought the ice cream and I was a bit surprised because it's damn too pricey now! I don't really want to buy something that really pricey for a dessert (and it's only for 1 scoop? Blah) specially if you could make one. Well, sure the taste wouldn't be the same, but if you can make it by yourself why bother to buy.

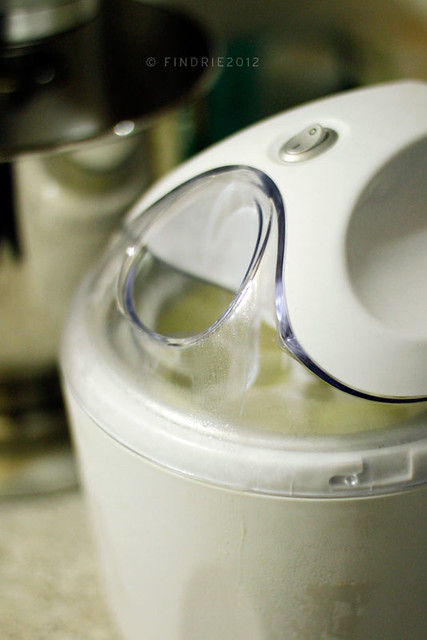
Ice Cream Maker
The Ice Cream maker

Anyway, I'm using recipe from 'Just Desserts' book again. I know that cookies and cream ice cream basically is a vanilla ice cream and you combine any biscuits you like on it. I think most of people are using Oreo biscuits. I made it a night before and the ice cream is ready in the next day. The texture is really soft and creamy, but I think it should be in the freezer for another 12-24 hours.

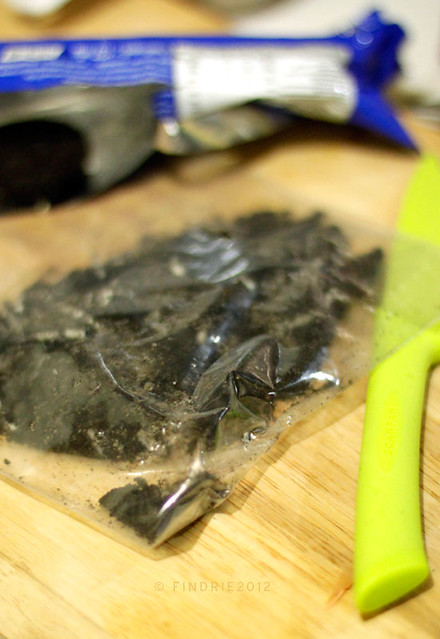
Crashed Oreo
Crushed Oreo

My son was so excited when he knows that the ice cream's ready. He just ate it straight away after he's having Sunday brunch and said "I want it again after dinner". When I asked him how was the taste? He just said "Really Good Mom!" and smile. Well, Goodbye B&R from now on and Hello Homemade Ice Cream :D. I'll try to make different flavor next time.

Cookies and Cream Ice Cream
Enjoying his favorite Ice Cream

Vanilla Ice Cream
Just Desserts by Daniel Tay
Makes about 500 g
  • Vanilla bean 1, scrapped from seed and pod cut into 1-cm lengths
  • Cream, 125 ml
  • Milk, 220 ml - I used skim milk
  • Egg yolks, 65 g - I used 3 egg yolks
  • Sugar, 85 gr - I used 80 gr only 
  • Crushed Oreo Biscuits - 5 or more biscuits 
Combine vanilla seeds and pod or vanilla essence with cream and milk in a saucepan. Bring to the boil over low heat, then remove from heat.
Whisk egg yolks and sugar in a mixing bowl. Stir in some warm milk mixture to temper egg yolks, then pour tempered mixture into saucepan and mix well with remaining milk mixture.
Return saucepan to heat and bring mixture to 85ºC, then place immediately into an ice bath to cool. Strain mixture into a bowl. Cover loosely with plastic wrap and refrigerate for 2-3 hours.
Transfer chilled mixture to an ice cream maker and churn according to the manufacturer's instructions (I add the crushed Oreo when the mixture already thick like an ice cream). Store in the freezer.

Saturday, January 14, 2012

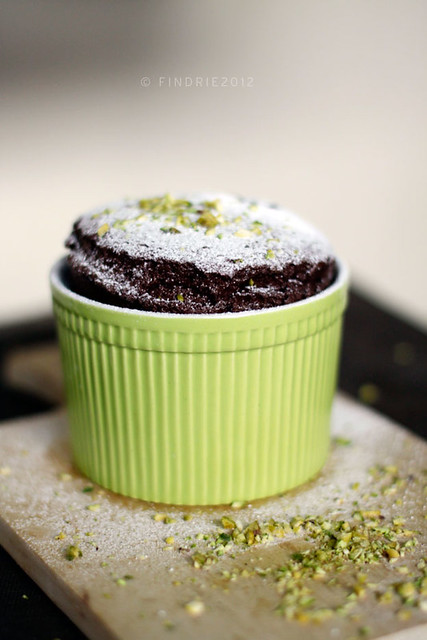
Chocolate Souffle with Pistachio

Chocolate Souffle with 
Pistachio
Chocolate Souffle with Pistachio

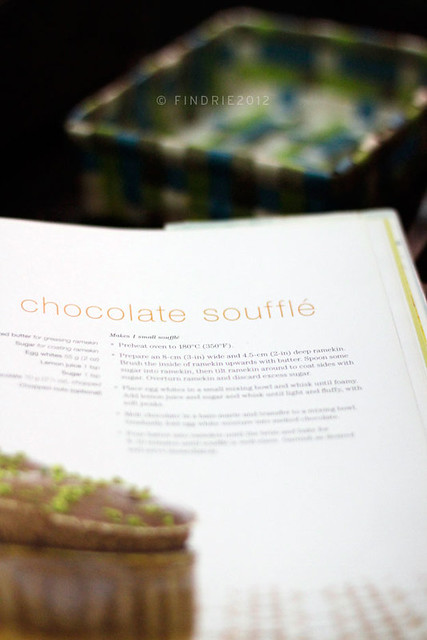
OK, Now it's time to do something else than Macarons :P I had this book from Daniel Tay (owner of Bakerzin) 'Just Desserts' for more than 2 years now. But still I haven't try any of his recipe yet. I bought this book because I want to get the macarons recipe. Reading the recipe again, it suddenly make sense since I could do make macarons now. However, the method he's using as same as what's written on Primarasa Book.

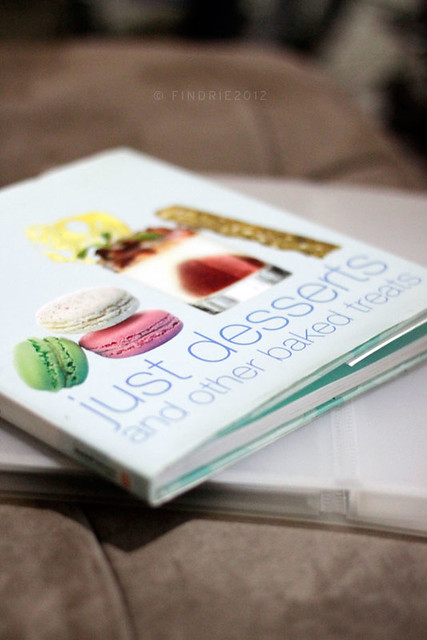
Just Dessert by Daniel Tay
Just Desserts by Daniel Tay

Last time I went to the restaurant, I had this Raspberry soufflé. Attracted by the photograph on the menu and the combination with Raspberry ice cream, I ordered that for my afternoon tea time. Not long after the waiter came with the soufflé, and I ate it afterwards. Unfortunately the taste was not what I've expected, it didn't taste good and sadly I still could smell the egg white from it! The texture was a bit undercooked (I guess).. You could actually spoon the cake and touch with your finger and it just break like a fluffy beaten egg white. And the smell euuwww.. I'm sure if Chef Gordon Ramsay from Hell's Kitchen there, He would be yelling hysterically straight away "It's RAW!!!" LOL.

So I told the waiter about this, but this lady told me that the texture of soufflé supposed to be that way, it's gooey inside. But I could tell which is gooey and raw by the smell and texture... I thought I had soufflé before in a different restaurant, the texture wasn't like that. If just at that time I already had made soufflé by myself, I could really tell them with confident. Anyway, I think I'm gonna try to make one so I could really know for sure either the cake really supposed to be like what she said.

Just Dessert by Daniel Tay

Chocolate Souffle Recipe

I'm using the recipe from the book, and I just realize how simple the recipe is! It doesn't need any flour, just egg white as the main ingredients! I think that's what makes the texture light and airy. The recipe was only for 1 serving which just what I wanted. It's funny how you actually sit in front of the oven waiting and watched how it raised.. just like I usually did while waiting for the feet came out from Macarons. The Funny part was when it raised and already cooked, I take it out from the oven and sprinkle some sugar on top (also pistachio), and ran quickly to the spot when I'm about to take photo of it. I think it's been done only in seconds! As the soufflé will be deflated not too long once it was pop out from the oven. I could only took 5 frame before it's deflated.... How cruel is that? LOL.


The Result: Texture was light, airy but yet in the middle part was a bit gooey. I was using bittersweet chocolate so it's not sweet at all which was actually good! Despite on the healthy ingredients (no butter, no egg yolk, no flour) I'm not really a fan of this kind of cake. Maybe next time I'll try other flavor or combine it with ice cream so it'll be more interesting to eat :P

Chocolate Souffle with 
Pistachio
Gone in 50 seconds!

Chocolate Soufflé
from Just Dessert by Daniel Tay
-makes 1 small soufflé-
  • Unsalted butter - for greasing ramekin
  • Sugar - for coating ramekin
  • Egg whites 55 g
  • Lemon Juice 1 tsp
  • Sugar 1 tsp - I used icing sugar
  • Chocolate 70 g, chopped
  • Chopped nuts (optional) - I used Pistachio
Preheat oven to 180ºC (350ºF)
Prepare an 8-cm (3-in) wide and 4.5-cm (2-in) deep ramekin. Brush the inside of ramekin upwards with butter. Spoon some sugar into ramekin (I used icing sugar), then tilt ramekin around to coat sides with sugar. Overturn ramekin and discard excess sugar.
Place egg whites in a small mixing bowl and whisk until foamy. Add lemon juice and sugar and whisk until light and fluffy, with soft peaks.
Melt chocolate in a bain-marie and transfer to a mixing bowl. Gradually fold egg white mixture into melted chocolate.
Pour batter into ramekin until the brim and bake for 8-10 minutes until soufflé is well-risen. Garnish as desired and serve immediately.

Happy Baking :)

Friday, January 13, 2012

Earl Grey Macarons with Salted Caramel

This is so far the best Macarons that I ever tasted (and made)!! Honest!
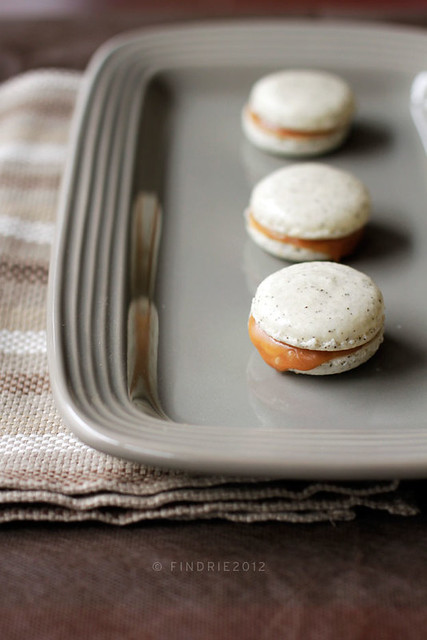
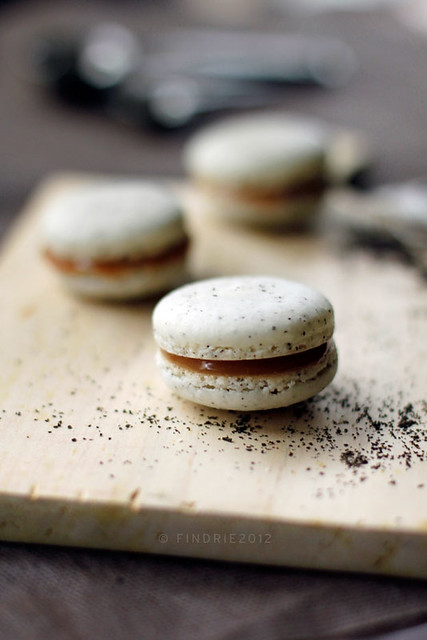
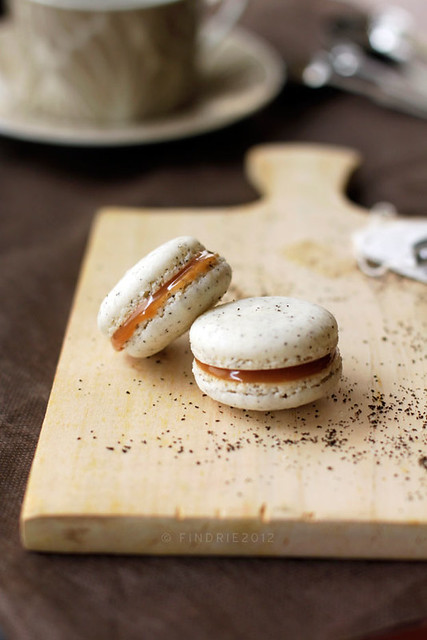
 Earl Grey Salted Caramel
Earl Grey Macarons with (melting) Salted Caramel

 I got this recipe through this blog food je t'aime, and thank you for inventing this combination. I already had similar Macarons (bought) with a caramel salted filling (but the shell wasn't taste of Earl Grey Tea) and I like it a lot! So when I saw this recipe, I was so happy and couldn't wait to give it a try. I love Earl Grey Tea so much because of its fragrant. I think I like it more than Jasmine Tea's fragrant.
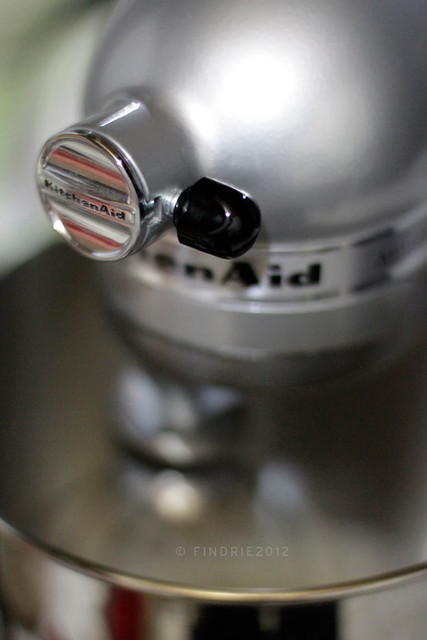
My K A
The silver chrome.. Oh How I Love the way you look :P

Last time I made an Orange with Ginger Macarons still the recipe was from Primarasa book. The taste was so so, not really my favorite. I think I'm gonna create something with Orange but with different combination later. Beside on the taste, I also made a mistake for not grinding the almond powder really well. It turned out like a disaster. When its baked the shell was cracked, no frilly feet, etc. This got me thinking that, Macarons is really about being obey to the detail and consistency.
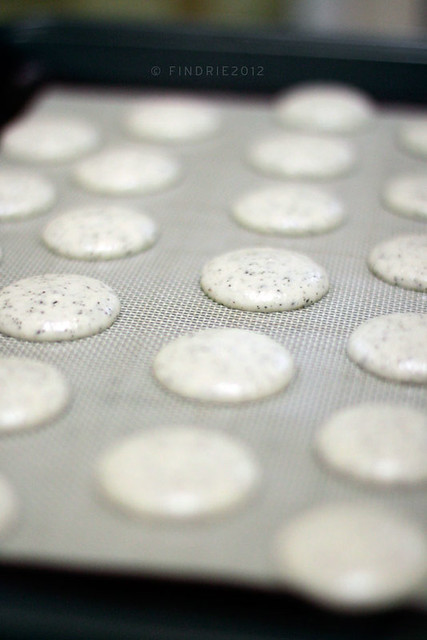
Macs before into the Oven
Piping to the Silpat - Somehow I'm getting better on making those same size circles
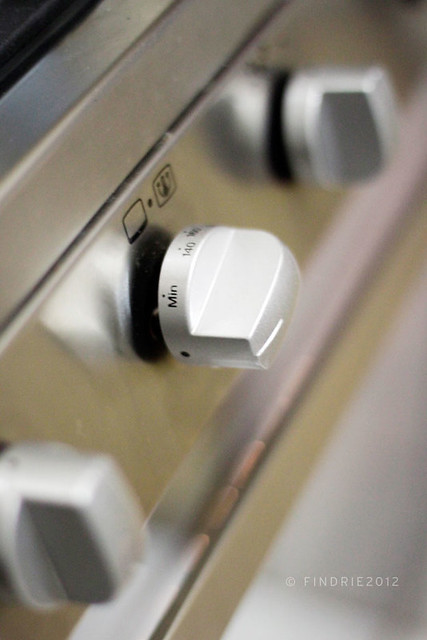
My Oven
Preheat the oven into 160 C

Anyway, I got all the ingredients for this one and ready to make it. This time I aged the egg white more than 1 day on the fridge (2 days I guess, I forgot). And before using it, I usually keep it on room temperature until it's not cold anymore. Using my basic macaron recipe (I don't use the ingredients measurement as in the blog) and adjust it by adding the Earl Grey Tea.

The exciting part was when making the Caramel! I never (really never) had made caramel before. I don't know why I haven't give it a try. I think because I'm not really a big fan of it. But until this time...it's just changed my mind :P. It was written clearly on the recipe and turns out really easy to make. And the best part is when you combine the sea salt into the caramel. When they both incorporated... Ooh you just can't stop tasting it! I swear If I'm not on my healthy diet, I'd have this everyday!
Caramel Sauce
Making the caramel sauce while waiting

 This time I grind the almond powder until it has no lump at all (I get rid off it). And the egg white was already beaten until it's stiff. The almond & egg white were fold correctly and have watery based after. Resting until it's formed (more than1 hour). Done! Into the oven... let's see how it goes.

Almost There
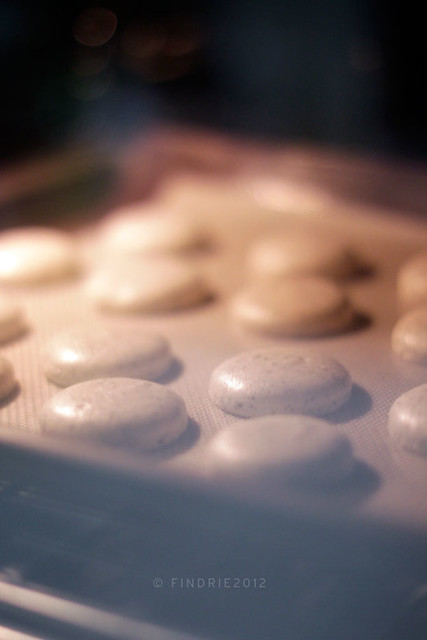
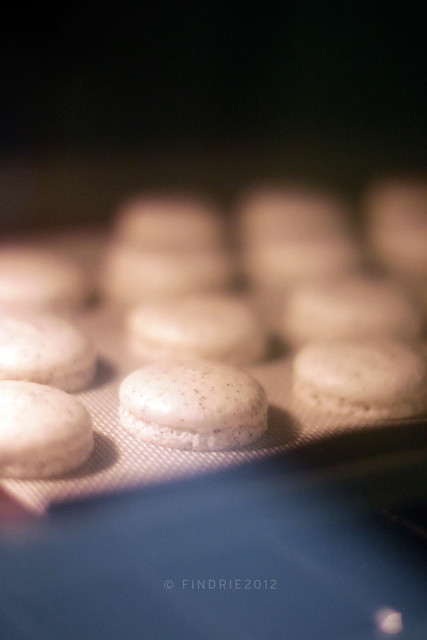
Inside the oven.. Almost there...

The Happy Feet
Every time I look at this, I couldn't stop smiling

The Macaron raised really good and has a pretty feet again! Although it was not as frilly the first one, I'm quite happy with it :D. I never try to pick off the macarons from baking paper just after it came out from the oven. I usually wait until it's really cool down. This macarons made in two batch with different baking sheet.  One using baking paper, the other one using Silpat. Turns out, the one which using Silpat has a really nice bottom instead of the other. I keep all on an airtight container and give the caramel filling the day after. And Yes, It was Really really good!

Earl Grey Salted Caramel
Earl Grey Macarons.. oh the fragrant!

My hubby is the best tester, because he would honestly say "great" if it's great and "not" if it's really not that good. This one he said really good (beside the lemon macarons), he likes it!. The next day I brought this to my friends and had some too for my friend's birthday. They like it too. Just today my sister came by and she also try this, she said this is the best taste ever too! Unfortunately it's only one left, so she couldn't have more :P

Earl Grey Salted Caramel
The melting salted caramel

I'm so happy with the taste results. This is definitely will be my favorite Macarons!

Now, Where are Those Feet?

After the successful Lemon Macarons before, I did make another batch for different flavor. This time I'm gonna make Chocolate Mint and Coffee Macarons.

Here's the thing. Once it was succeed it couldn't be failed, right? Unfortunately it didn't work for Macarons, or maybe just me? :P I made The first batter for Chocolate Macarons a bit runny. And the Coffee Macarons was a bit thick. But for all those mistakes, I have learned that things that made those Happy Feet rising, it's all about the powder, the consistency of Meringue, the process of folding the batter and also timing to let the Macarons perform a skin before it gets into oven.


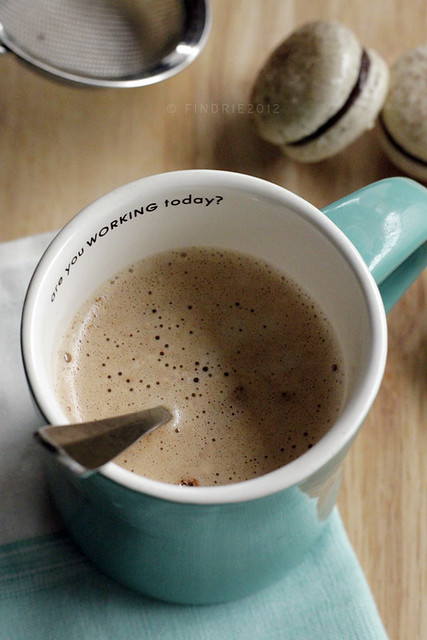
Are you working today?
  Hot Teh Tarik for Afternoon Tea

What ever method that you're taking for making Macarons (Italian Meringue, French, Swiss) I think the meringue should be stiff before you fold the dry ingredients on it. And oh yeah, remember that the dry ingredients should be really smooth (specially almond powder) if it's not, it'll make the batter thick and will take longer time to perform the skin. Also a big chance to get cracked when it's in the oven.


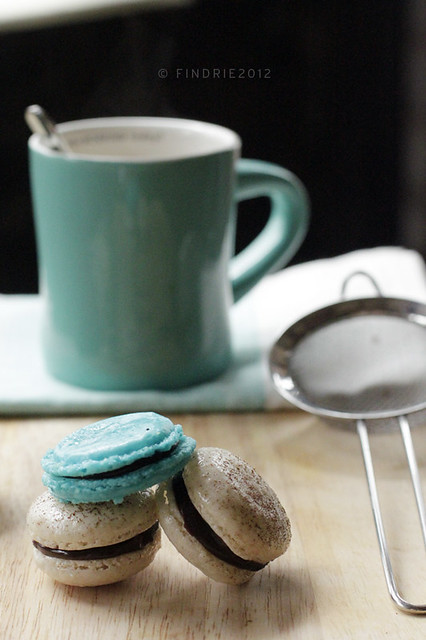
Blue Minty Chocolate Macarons
Minty Blue Chocolate Macarons

I still feel the recipe is too sweet so I reduced the granulated sugar. I don't know whether this made a big impact/changes for the macarons, as I've seen the macarons didn't perform a frilly feet like the first one I made. Anyway, I keep looking on the internet and try to get the answer. I found so many valuable tips on the web, The latest  I read was from the owner of Tartelete's Blog: Helene Dujardin Demystifying Macarons and also from here Cure Happiness - Macarons. 

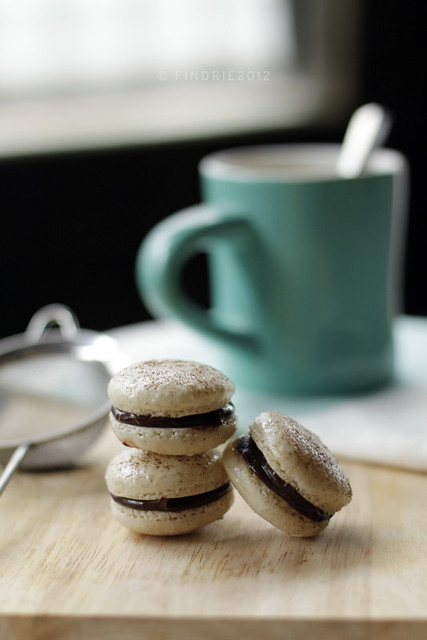
Coffee Macarons with Chocolate Rhum Ganache

One thing for sure I'll remember what Helene Dujardin said on her tips that There's only one thing to tackle this 'little devil': practice, practice and keep practice!. I'll do that for sure :)

Minty Blue Chocolate Macarons
from Primarasa Book 'Macarons'

Ingredients
Basic Macarons
  • 100 gr granulated sugar
  • 80 gr Egg White - (This time I aged them 24 hours on the fridge and let them in room temperature 2 hours before start making macarons)
  • 100 gr ground Almond
  • 100 gr Icing Sugar
  • 1/8 tsp cream of tar tar - (I added this)
  • Blue Food coloring - (I used Wilton Blue)
For Filling - Chocolate Ganache
  • 150 gr Dark Chocolate - Chopped - (I combined Dark and Bittersweet chocolate)
  • 100 ml whipped cream
  • Mint Essence 
How to
Prepare basic Macarons 
  • Combine icing sugar and almonds in a mixing bowl and mix well. Set aside. (These dry ingredients should be very smooth, no lumps at all)
  • Combine egg whites and sugar in a mixing bowl. Place in a bain-marie and whisk constantly until sugar is completely melted. Remove from heat and whisk on a medium speed for 3 minutes. Add cream of tar tar and increase to high speed. Add food coloring, continue to whisk until mixture is light and fluffy, with soft to medium peaks.
  • Combine dry ingredients to egg whites (I usually divide it into 4 times). Fold the ingredients in one circular way, mix the rest until fully incorporated. You should be getting a slightly watery base (When you pull out your spatula it will drops continuously by it self and made a ribbon like patterns).
  • Spoon batter into a pipping bag and pipe out 2-3 cm circles (depending whether you want a small or medium size macarons) 1-cm apart on line baking trays.
  • Let the Macarons rest from 15-30 minutes (depending on the weather) or until if you touch the top it will not stick into your finger. Remember also to check the side. (The Macarons needs to be rest to perform a skin so you'll get those Frilly Feet when its bake).
  • Preheat the oven to 160 C and bake macarons for 10 minutes. Macarons should be start rising after first 5 minutes. Reduce heat to 120 and continue for another 10 minutes. Remove and set aside to cool.
Filling - Chocolate Ganache
  • In a sauce pan, bring to shimmer 100ml of whipped cream. Pour into a bowl of chopped dark chocolate, mix them until it's combined. Let it cool then add mint essence for your liking.
Remove gently Macarons from baking paper, match the same size circles. Spoon chocolate ganache into a pipping bag. Pipe some on an overturned macaron, then sandwhich another macaron. Repeat remaining macarons.

I like to rest the bake macarons overnight in an airtight container in room temperature. Then on the next day I'll put the filling. You can store Macarons into a fridge, and eat them next day, you'll get even more great taste and texture.

Happy Baking :)